Thursday, January 31, 2013

Spain Bound

This is a layout I've been meaning to do for way too long now.  My amaZing cousin Sarah has been living in Spain for the past two years now (with a little break coming home this past summer for my wedding.)  Anyway, this layout is just a few of the pictures we took when she first left at her going away party, or as I call it "Adios Prima Favorita"  Love her dearly and miss her!

Oh and I won't lie, I finished this layout earlier in the week but since it's January and I'm in NY, it's dark by the time I'm home from work and of course there is no natural lighting once the sun is down.  Unfortunate isn't it??  The hubby should really let me stay home and be a scrapbooking stay at home cat mom...I'm working on it!!  Point is, I'm not that happy with the pictures so I'm sure I'll retake them this weekend if I get a chance.


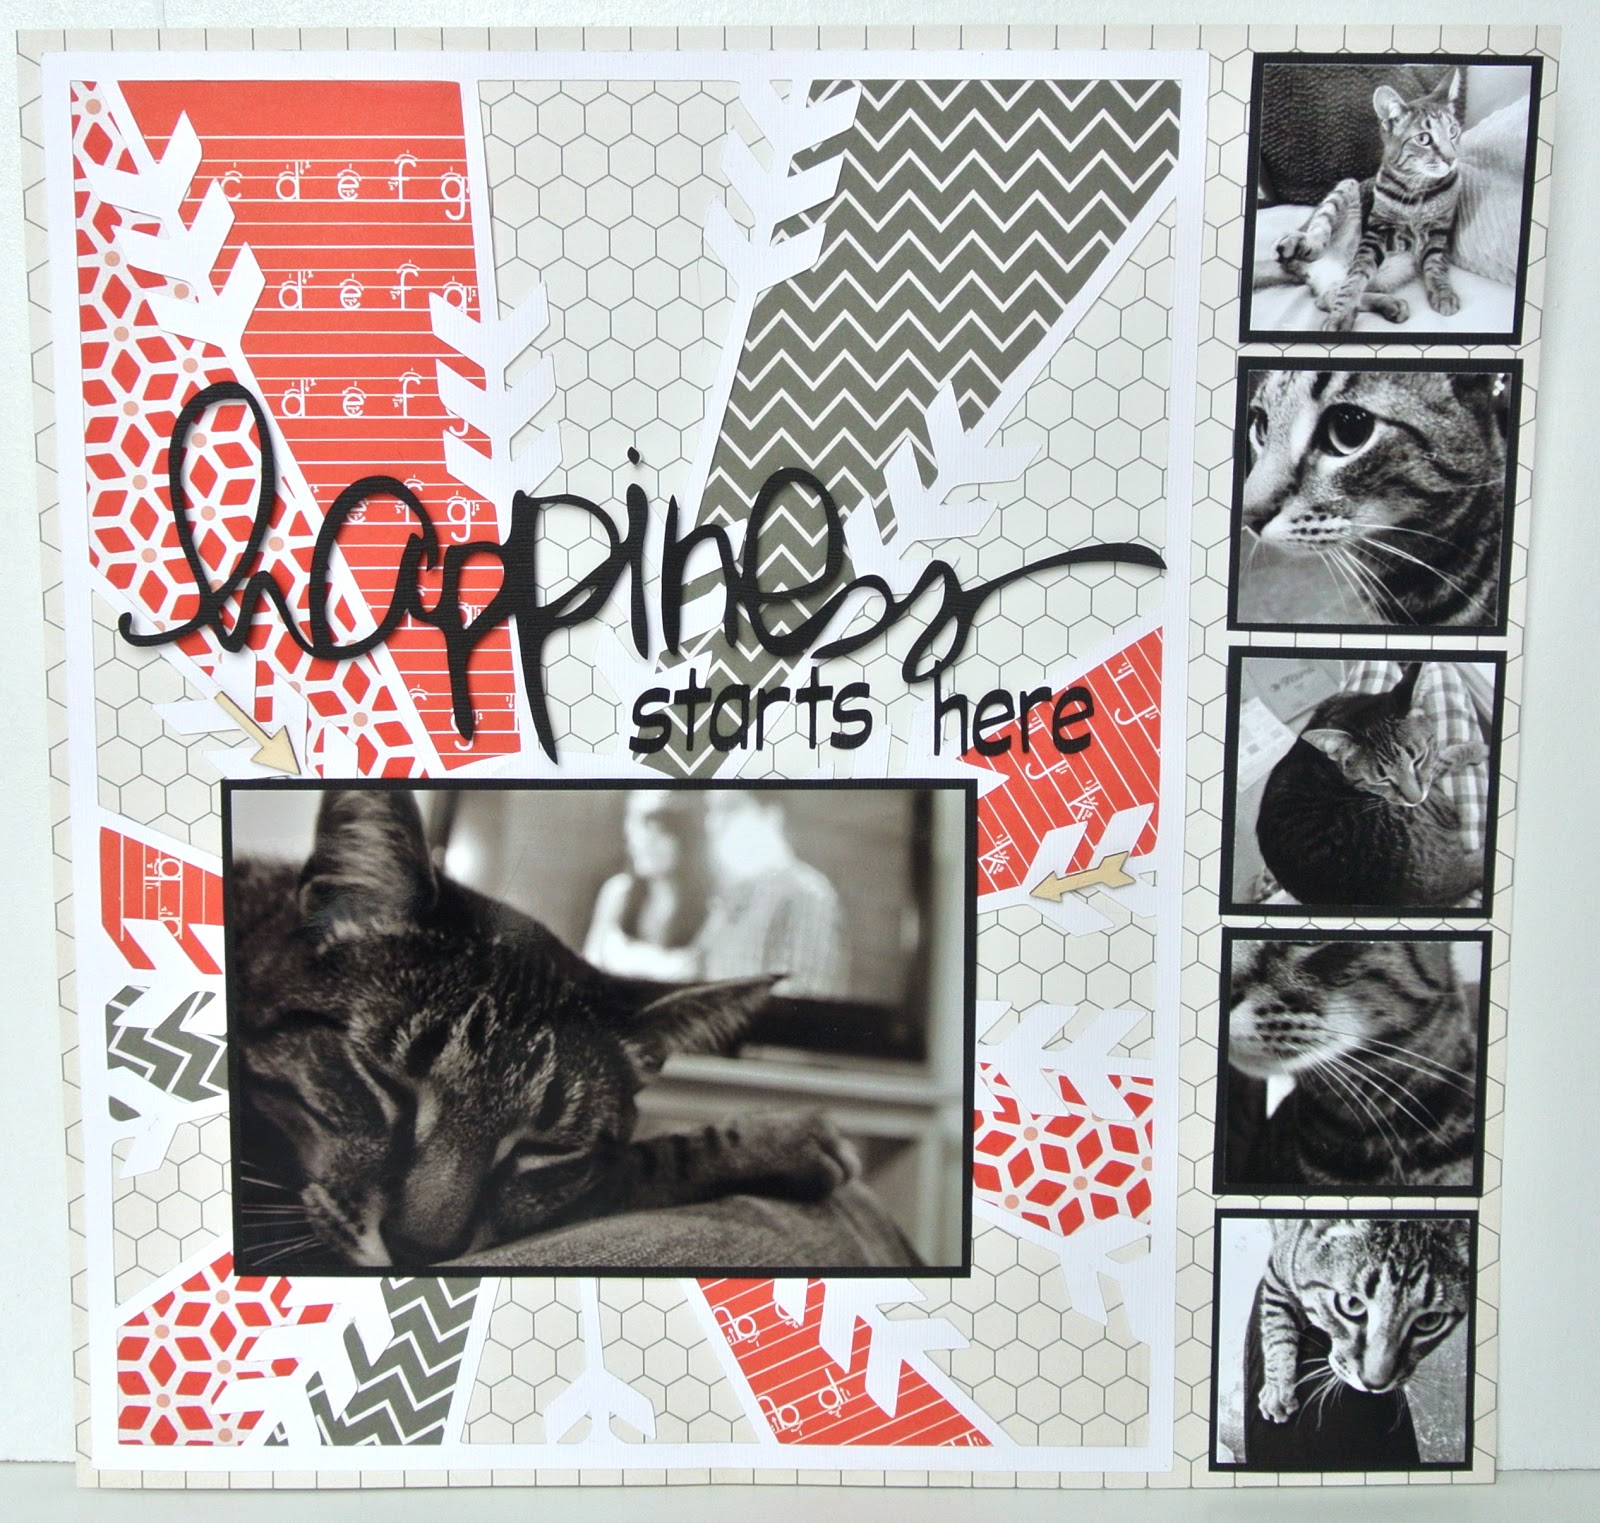
Here's a full view of the layout.  I cropped it so I kind of cut off the pink background that i adhered the white patterned paper background on. 


Love these letter stickers by Amy Tangerine.  The vellum border sticker is a fun touch too next to the vellum background.  


Who doesn't love these little wood veneer stars??  they are pretty much always sold out so just click to by notified when they are back in stock and buy them that day!


Close up so you can see the dimension (hello foam pop dots!)


Freckled Fawn arrows, loving all the wood veneer.  So funny to think that when I first saw the wood veneers I hated them!  you can see I also used my date stamp to add the date.  I went over it a few times to give it a more "messy" look.
  
The background paper I used was the Love is in the air 12x12 by American Crafts which is part of the Xoxo Collection.

Thanks for following along.

Christine <3 

What are you most excited for??

What have you been waiting for from CHA 2013??


I am patiently waiting for the new Yes, Please collection by Amy Tangerine for American Crafts.  I've never loved a collection so much that I honestly want everything!  This is exciting for me but not for my paycheck, HELLO!  Here are some peaks at the collection. 


I love the fun, happy, bright colors of this collection but yet, muted. 
I love these little printed clothespins especially!

Thanks for following along, what are you waiting for?!?

<3 Christine

Tuesday, January 29, 2013

Photographing your layouts

Is it not the most upsetting when you work so hard on our scrapbooking project and go to take a picture just to see that it doesn't look half as good as you would have liked??  That's how I was feeling for a long time now, honestly too long!  So while on the Two Peas Blog I read one of the best posts, Photographing Your Projects with Jen.  This post really opened a door for me and got me thinking. 

I was at Staples and checked out the poster board because of course, I had to try this.  I have a nice new camera, the Nikon J1, which I love and it still wasn't showing the detail and capturing my pictures as I would like.  Of course I wanted two pieces of posterboard for this, one for the bottom/floor and one for the backdrop.  I was being cheap and the posterboard was $15 for two pieces after tax and I said no.  SoOoo my battle continued and was back to square one.  When I got home I searched for whatever pieces of scrap wood we had leftover for my scraproom project and came across the perfect size of plywood.  I took a can of leftover white paint and painted a coat to make my own backdrop.  We had a leftover piece of white laminted MDF and brown (like hardwood) from what??? I have no idea, I assume something when it came to building the house.


So after my FREE photo backdrop this is what I had. I took all of my layouts that I have uploaded to my TwoPeas Gallery and re-took pictures of ALL of them.  To say the difference wasn't that noticeable is an understandment.   I'm kind of mad at myself because I deleted all the original pictures so I can't even show you how different they look (in an incredible way.)  I placed my little photo studio in our dinning room where there is lots of natural light, kept the lights off, and shot away.  I'm telling you having a nice white backdrop and floor is amazing and truly makes a heck of a difference. 

I took my photos at a normal looking at the picture view from across.  Today, Ali Edwards has a great blog post about how she photographs her Project Life albums.  She basically follows these same tips but takes her photos from above by standing on a chair.  I'm thinking I will definitely be trying this approach to see if I like it any better.

How do you take your photos?  Have you found any helpful tips and tricks??

Thanks for following along <3

Christine

Thursday, January 24, 2013

Happiness starts here

Love my little Riggle Miester.  I usually am drawn to greens and blues and forced myself to stay away from that for this layout.  I printed all my photos in black and white and chose pops of red.  I absolute love how this turned out.


Here is the full layout.  I cut the title, happiness starts here, with my Silhouette Cameo.  I also cut the background and can not find the website where I got it.  If anyone knows let me know so I can give credit!


I kept the embellishments simple on this layout as I really wanted to background to be the main focus (other than the cute pictures of course.)


The title fits perfectly.  This little guy always puts a smile on my face (oh okay, and my hubby!)


Thanks for following along <3

Christine

Saturday, January 19, 2013

Honeymoon Mini Album

I decided to get crafty with my Silhouette and try something new.  I cut my first mini album using 4x5 accordion fold mini album by Lori Whitlock.  

Here was my step by step process.  You can see Lori's tutorial on her website


Here's my finished album cover.


All the pages, sneak peak.


This is really a picture leaving aruba not truly on our way there but it still works, look at that beautiful water!


 Aruba, here we go.  Some more old rub ons and love the cloud vellum from Dear Lizzy.


First day of relaxation and sun, enjoying it.  These little metal badges are from Making Memories, so old but finally used them (and of course some washi


Love this boy ^^


Pelican Pier (there really were pelicans here all the time, loved it!  I love adding the studio calico wood veneer stars to everything.


Added the seaside sticker from a soft spoken beach package.  Little wood veneer and What a Wonderful Word from Two Peas.  Love the pelican (my dad's favorite)


So relaxing.


I cut the "Feet in the sand" with my silhouette, Marker Felt font.  I then added a patterned paper underneath for some color.


The escape sticker is an old sticker from my stash that I used to get at AC Moore or Joanns.  Love the simplicity of this page.


This was a plain white sticker which I love white but I wanted it to pop more against the already neutral background so I put in on purple card-stock and cut it out.


Enjoying the sunset with my hubby.  Added some perfect vacation rub on's that have been in my stash forever.


Snorkeling adventure!  Kept this page simple with two circle tags from Elle's studio.


Up close of these tags by Elle's Studio


Bright, fun, colorful washi tape.  Simple.


Perfect sunset to end the album.


Side view to see the dimension of the word explore.


Thanks for following along <3 

Christine

365...everyday

I made this page with 2x2 photos for the polaroid fun look.  I absolutely love it so much I framed it in my scraproom.  I took one picture from every month to represent what was going on throughout the year.  Some of my favorite moments.


Here is the full layout, framed in my scraproom.  Little embellishments for each separate month.


Close up of the first few months, starting with the adorable Riggle Monster.


Highlights in the middle of the year.


And then the final months of the year.

Thanks for looking.  I had a lot of fun digging through scraps and different brands to put pieces into this layout.

Christine <3

Thursday, January 17, 2013

Wedding layout

Finally started scrapping some of our wedding photos.  I really do love how this one turned out.  All of the papers in this layout are different brands and I love how they all still work together.


Here's how I started my process.  Grabbed the supplies that I knew I wanted to use.


Love my wood veneers and always try to incorporate them.


I chose papers from different brands but in the same neutral, grey family.


Cut up the lyrics to our wedding song line by line and added them to the background paper.


Started adding my photo and paper layers.


Added a few veneer stars here and there.  They fit perfectly over the stars on the background paper.


Close up of starting my stamping.  I will say I wish the black wasn't so bold so I'm sure I'll touch that up.


Wood veneers to spell out the date.  Little messy heart stamping for a little extra embellishing. 


Love the little badge "right now" 
  

And here it is, the full layout.  I love the neutral greys with the touches of green from the border background paper and washi.


Thanks for following along.

Christine <3 

Ali Edward's Technique Tuesday Stamp Sets

L.O.V.E. these stamp sets by Ali Edwards.  Her handwriting is amazing and I wish it was mine.  I think I need to go back to practicing my handwriting on a daily basis like I did when I was a kid.  Anyway, these stamp sets are perfect for cards, layouts, project life, anything your creative mind desires.  I love how they look and they turn out perfect every time I add them to something. 
Days of the Week by Ali Edwards  
  
Beautiful by Ali Edwards

Hello by Ali Edwards

 Life Circles by Ali Edwards

 Incredible by Ali Edwards


Tick Tock by Ali Edwards

Good Day by Ali Edwards 

All Occasions by Ali Edwards   


There are so many that I love, same I already have gotten, and I'll definitely be adding more (hopefully all) to my collection.  I can't help myself.

Thanks for following along...

Christine <3